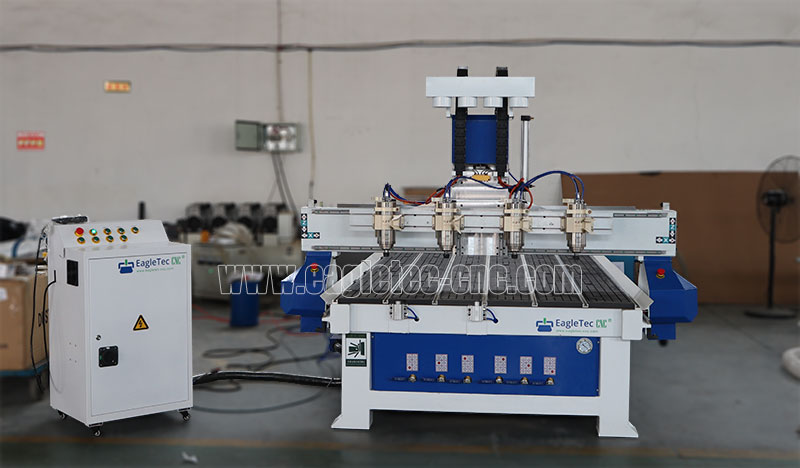
Four spindle cnc router is a typical model in the multi-head cnc routers. It is a cnc machine particular for mass production of rilievo projects. Sometimes it is also used in Slatwall panels fabrication. Equipped with four spindles, it executes the machining of 4 pieces in one working cycle. We have supplied the machine with four pieces of height-adjustable spindle holders to facilitate the alignment of the tools on the four spindles. You can see the benefits of this fixture system in the demo below.

When you operate the machine for the first time, you might feel a bit lost about where you should start. And what should be all the essential steps? In this blog post, I'll cover the whole process of how to operate the EagleTec 4 head cnc router from A to Z.
Let's take a closer look at each step by watching the video tutorial below.
I am typing the transcript below to make you understand each step better.
Step 1. Cutter Installation
Let's remove the previous tools first.
We then mount the desired tools on the 4 spindles.
Step 2. Adjust The Space Between the Spindles
Loosen the 4 bolts of the spindle holder
Move the spindle to a suitable position
Tighten the 4 bolts
Pro Tip: The spindle spacing here should be set according to your actual production needs.
Step 3. Compressed Air Connection
Step 4. Switch On Machine
Release the Emergency Stop button first (If it is not activated, ignore this step)
Switch on the CNC machine by pressing the on/off button
The system is loading; please wait.
Switch on spindle 1
Switch on spindle 2
Switch on spindle 3
Switch on spindle 4
Switch on the Material Alignment Pop-Ups
Step 5. All Axes Home
When the home action menu pops up, please press OK to proceed. And the X/Y/Z will go home.
Pro Tips: The role of this step is to calibrate the coordinate system of the CNC router. In other words, let the CNC system know where the zero point of the machine tool is.
Step 6. Align the Wood Sheet
Since we have raised the material alignment pop-ups before, we can push the board by hand to align it with the positioning cylinders.
Shut off the pop-ups.
Switch on the vacuum pump (also open the vacuum zone valves)
Check the suction by hand
Step 7. Workpiece Origin Setup
Manually move the X and Y axes to the appropriate position with the handheld unit.
Adjust the spindle height so that the 4 tools are at the same level (align the tools)
Specific steps:
Unlock the spindle holder first
Adjust the height
Lock the spindle holder
Press XY-0 and Z-0.
Pro Tips: The workpiece origin should be consistent with the zero point in the tool path file. (G-code)
Step 8. Load the File (Tool Path)
Press RUN to enter the file list menu, select the desired file and press OK.
Pro Tips: since the cut is done by one pass only, the suggested feed rate for the CNC should be no more than 3,000mm/min.
It doesn't matter which cnc machine you purchase from EagleTec CNC; you will get a complete instruction manual like this. By following the steps, you could master the operation of the device, not to mention our timely online after-sales assistance service. You can sleep tight if we are working together.
If you are looking for cnc machines of great quality with unmatched support, please don't hesitate to contact us.
Original Post from EagleTec CNC
Copyright: original works; for permission to reproduce, or reprint, please be sure to indicate the form of hyperlinks to the original source of the article, author information, and this statement.
Copyright © Jinan EagleTec Machinery Co., Ltd. All Rights Reserved | Sitemap